How to Make a Pillowcase With French Seams

Step by step directions are included in this envelope pillow cover tutorial, including how to finish the inside with a french seam.

It's no secret that one of my favorite ways to refresh a room is to change out the pillows. It's fast, easy and usually doesn't cost a small fortune. Today I'm sharing an envelope pillow cover tutorial and you don't need any special skills. It's straight line sewing and the measuring part is actually simple. So fire up your sewing machines and let's get started!
*Affiliate links included. Click HERE for my disclosure statement.
Envelope Pillow Cover Tutorial
For two 20 x 20 Pillow Covers you will need 1 1/3 yards of 54 inch fabric. Find this Robert Allen Geometric HERE.
Cut a piece of fabric 48 in. x 21 in. On your ironing board, press one of the short ends over 1/2 inch. Turn that edge over 1/2 inch again and press well.
Repeat this step for the other short end. Stitch both ends.
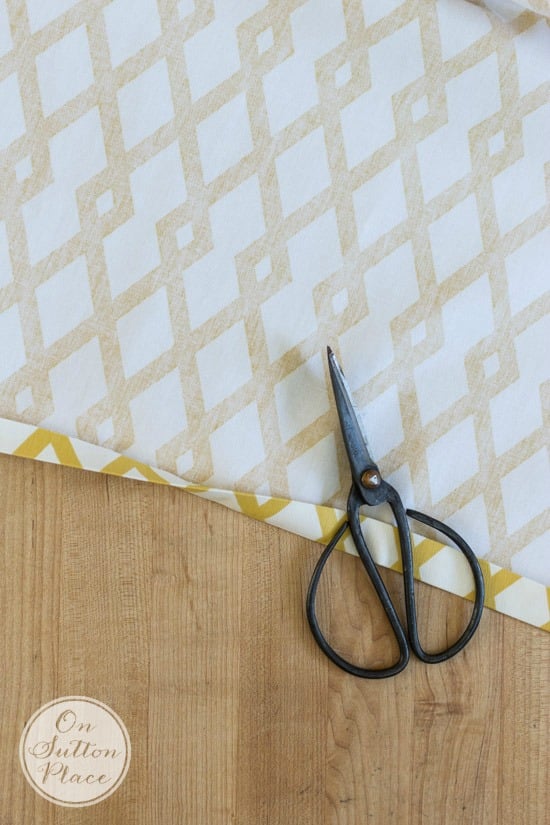
Lay your piece of fabric on a flat surface RIGHT SIDE DOWN with a measuring guide handy. If you don't have a sewing ruler, a yardstick will do. Fold the bottom short end up 12 inches.

Fold the top end down 14 inches. The top edge will overlap the bottom edge. Pin the sides together. Using your presser foot as a guide, stitch both sides of the cover a scant 1/4 in. seam allowance. (Follow the arrows.) Remember your fabric is WRONG sides together.

Trim your threads and remove the pins. Turn pillow cover INSIDE OUT. Press side seams well.
How to Sew a French Seam
Now we are going to sew French seams. A french seam will ensure that all the raw edges are hidden INSIDE the side seams. By taking this extra step, the inside of your pillow cover will be finished off beautifully.
Sew side seams again at 1/2 in. seam allowance.

Make sure all your threads are clipped. Turn your pillow cover right side out. Press the entire cover making sure to hit the side seams well. Your final pillow cover measurement may be slightly less than 20 x 20, depending on how accurate you are with your seams. I usually wing it, so my measurements are not all that precise. No worries about the pillow cover fitting though…a slightly smaller pillow cover makes for a fluffier and fuller pillow.
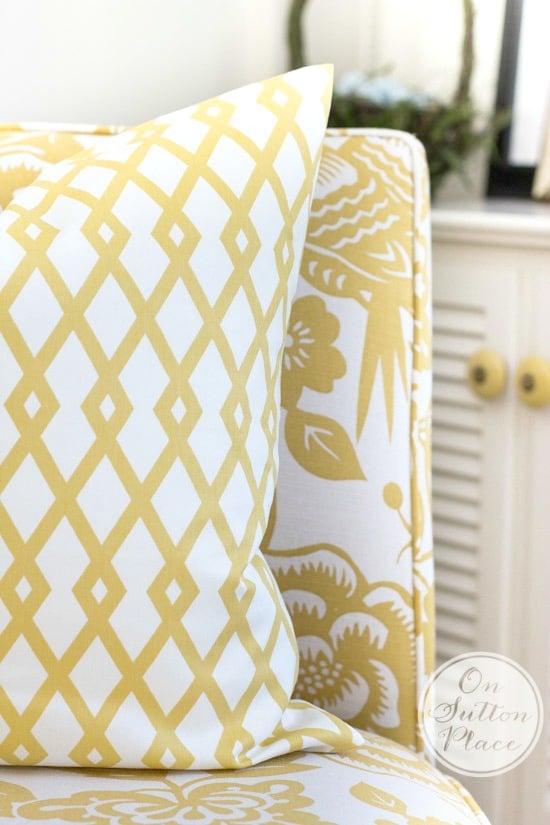
You now have a pillow cover that will stand up to just about anything and is nice enough to give as a gift. When I first opened my online shop this is the way I finished the inside of my pillow covers. I didn't have a serger then and could not bring myself to sell anything with raw inside seams. A french seam is so easy and offers a big punch in taking your sewing projects to the next level.
Just remember: WRONG sides together first. RIGHT sides together second.

Thank you for stopping by…let me know in the comments if you have any questions about the envelope pillow cover process.

Join our mailing list and
get this free eBook on
Farmhouse Style!
Click the image to
learn more.

How to Make a Pillowcase With French Seams
Source: https://www.onsuttonplace.com/envelope-pillow-cover-tutorial-french-seam/